Thursday, January 29, 2015

1776 stays from Corsets and Crinolines - Patterning & Fitting

I never finished the Diderot stays. The day I tried to put grommets in them, I discovered that the hopsack linen and the sturdy cotton twill I used as lining were, together, too thick to be able to make the big holes for my size 0 grommets. The weave of the hopsack was too loose and after I pierced it with my awl, it would immediately start to close back up. I gave up.

Instead I'm trying to make the 1776 stays from Nora Waugh's Corsets and Crinolines. It's only a two-piece pattern so I hope it will go quickly because Sherwood Forest starts next weekend. But Melissa and I probably won't go until March, so I have time to scramble together our costumes, but I'm a slow sewer so it will still be a crunch.

This is the first pair of stays that I have actually tried to fit to my figure, and I'm really, really glad I've taken the time to make several muslins, as irritating as it is.

The right side of this picture (viewer's right) shows how this pattern first fit me after scaling it up but without making any other changes. I think the original wearer had very slender hips because there was a nine-inch gap between the lacing holes at my hips but only a two-inch gap at the lacing holes at the top.


I took in a little bit at the top of the center back, and then put in an extra tab on the side-back piece, adding a little to the waist as well. The new mock-up fit my dress form much better.


I felt that it was still a bit long in the waist at the back, so I pinned up the excess and transferred the changes to my pattern piece. Even though, to my eyes, the center back looks straight on the dress form, it was clearly NOT straight on the pattern when laid flat.


I fixed the center back pattern piece and sewed up a new mockup. I haven't made any changes to the front pattern piece at this point. It fit my dress form quite nicely and I thought I was ready to go, but a little voice at the back of my mind kept whispering, "But everything you've read on the costume blogs says that the seam is supposed to be curved at the side FRONT, not the side back." I tried to convince myself that it wouldn't make any difference on a stays pattern that consisted of two pieces, and only one seam anyway, but I just had to retrace the pattern. I transferred the side-back curve to the side-front and straightened out the side back.


Sewed up a fourth muslin and pinned it to my dress form. I honestly couldn't tell any difference in the fit, but I suppose I'll keep it like this just for my own piece of mind since I don't know if it's okay to keep the side front seam straight and curve the side back.


One last change I am making to this pattern--and I won't bother with a muslin for this small change--is to take out that extra tab at the side-back. You can see on the dress form how it sticks out.

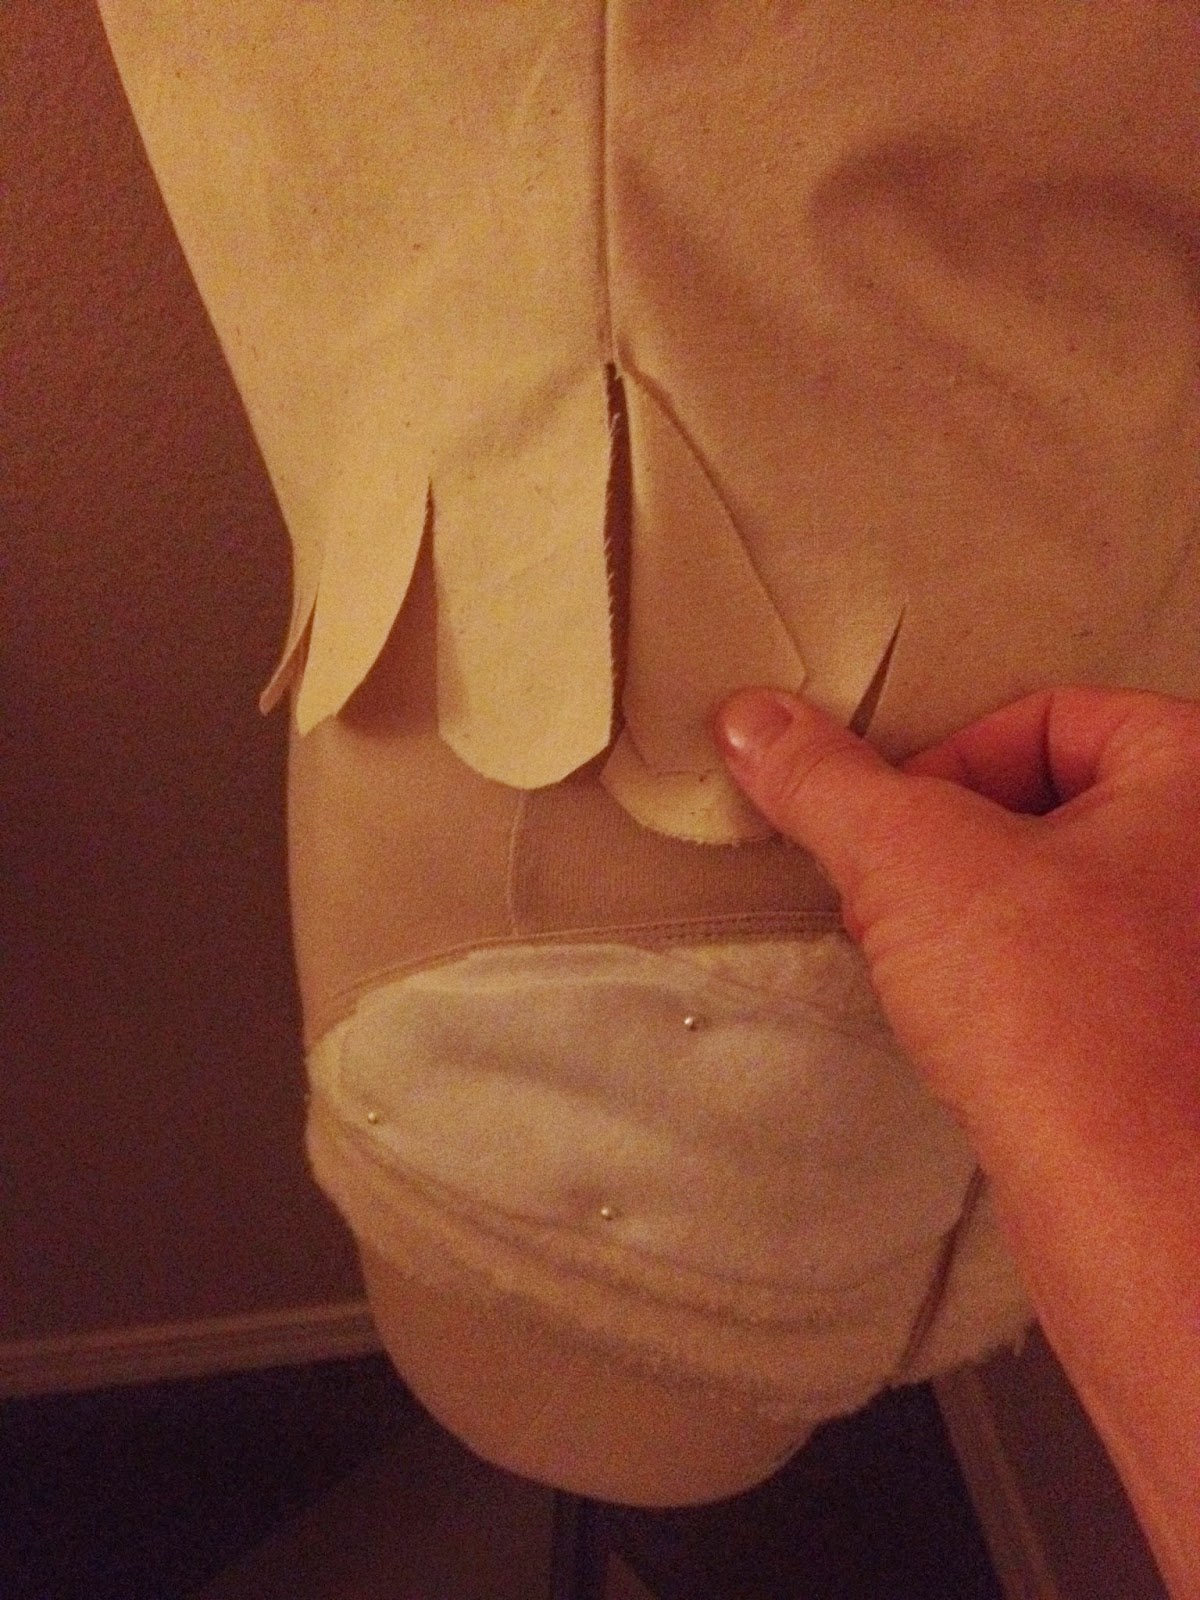


It was easy to just fold it back and tape it down on the pattern to get it out of the way. The line of the seam wasn't affected at all.

Now I just need to decide on what fabric to make this out of. I have some beautiful vintage silk brocade, supposedly hand-woven, that I bought specifically to make stays. But I feel like it should be part of a fabulous fantasy costume and I am having trouble visualizing how I want it to look. So I think I'll save it until I have a clear idea of the look I want. I'm leaning towards just using some white linen in my stash and making a peasanty-looking skirt. For some reason I've always liked the peasant look even more than high-class lady. But in my everyday life, I'm a bit of a plain jane. I can't tolerate heels and I can't stand the way fashionistas in this city dress. So my love of peasant looks is really a reflection of my natural tastes in fashion, I guess.

Wednesday, December 3, 2014

Simplicity 2890 Victorian corset - My cups runneth over

There are so many costumes I want to make, and I need the proper foundation garments for all of them. So I've been trying to get at least my corsets and stays done because those are the most important things for fitting historical patterns.

I made Simplicity 2890 in May. It went together very easily. I was excited about it. I loved the fabric--a vintage tablecloth that a friend had given me, with dogwoods printed on a pale yellow background. I thought the bust cups were going to be too big but they were actually perfect. Then came the moment to try it on, and that's when two of the grommets ripped out during lacing. I guess the fabric was too old and brittle. I was completely and utterly bummed out.

I made version two in last month (November) and from the get-go it was a whole different beast. I had lots of problems this time. I installed the bust and hip gores the same way I did for the first version, but the bust didn't flare out as much as the first one. I am rather top-heavy, so I need that flare.

I plugged away at it. I folded the back edge to the inside to form the back lacing strips, and for some reason, the facing ended up coming to the middle of the back hip gores. Wtf??? So I had to put a facing on the back to form the lacing strips, which I knew was almost certainly going to make the corset too big.

I plugged away at it. I'd chosen a supposedly 100% cotton, tightly woven home decor fabric for the corset. It was pink. As I began working on the corset, I realized I loathed that color. Once, when I was 12, I had the flu really bad. Fever, chills, etc. My parents got me a strawberry shake from McDonald's to make me feel better. I drank the entire shake, and then a few minutes later, barfed it all right back up into my Strawberry Shortcake trash can by the bed. The barf was the same exact shade of pink as this corset fabric. That's all I could think of. So I dyed it.

That pale pink is the back facing for the back lacing panels. That's the original color of my corset fabric. 


I dyed the corset a beautiful dark wine color. Most of which ran out as I was rinsing the corset. Son of a bitch. I am GUESSING that the fabric wasn't 100% cotton as had been advertised when I bought it from Fabric Mart, because wouldn't 100% cotton have held the dye better? I stopped the rinsing when I realized all the dye was going to come out if I kept going and accepted the fact that the dye was going to bleed on my chemise if I ever wore this.

I plugged away at it. One fine day, I went to my parents' house to pound the grommets in using my dad's nice work table. The fabric got all warped and fucked up looking with each hole I made with the awl. I don't think I have pictures of that.

ANYWAY, to make a short story long, I finished the corset, tried it on, and the bust is too small and somehow the sits too low and I can't make it work after all that. Here's some damn pictures of the damn corset anyway.

See how the bust sits too low?

Side view showing how my boobs are about to fall out of the corset.

Back showing how the corset ended up being too big because of the facing I had to add to the back.
Amount of waist reduction: 0 inches, thanks to the facing I had to add to the back. I could have tightened the bust area but I was trying to see if this corset was at all wearable. So I went about the house, threw some clothes in the washer, unloaded the dishwasher, put up the dirty dishes, and cleaned the litter box, then came back for one more set of pics.

Hmmmm.... Nope.
So not only is the bust too small, but it also sits too low. How did that happen? I am very short-waisted. I didn't have this problem with the first version, but unfortunately I deleted all the pics of me wearing the first version because I was so disappointed at the grommets ripping out.

Also, there is major wrinkling at the waist. How does this happen, and what would I need to do to fix it IF I was going to gut this corset for the boning and busk and try this pattern again?


Fitting advice would be much appreciated, if anyone has some. Also, has this taught me to start making muslins? Yes, it has.

I am thinking of just having one custom made by Kay Gnagey. Hers are around $120-$130, so very reasonably priced. I had one once, years ago when I had a job doing living history from time to time, and I loved it. The only drawback is that her ETA is 3-4 months from date of order.

Thursday, November 20, 2014

Diderot stays FINALLY (almost)

I finally made these (almost). By almost I mean that I haven't put the grommets in or made the shoulder straps yet, but they are almost functional.


These stays were hell for me to do. It's because of having to mark the boning channels on the pattern pieces. That always gives me terrible anxiety.

Are these even the Diderot stays? I actually just remembered that I made them from Ralph Pink's free pattern. Did he base that on the Diderot stays?

As per my usual approach to these kinds of things, I didn't do anything to size these to fit me. Well I made one muslin about two years ago, which was just from the printed pattern. It was slightly too big, so for these I just traced the pattern pieces out without the included seam allowance and hoped for the best. I actually think they're going to work out well.

I boned them with narrow cable ties. I like the way it looks, but I'm not sure how much shaping it's going to provide. I actually finished binding this a couple of months ago, but then started thinking it was too flimsy, and that the hopsack fabric I used was just going to fray to little bits when I started poking holes for the grommets and the grommets were going to tear out like they did on my first Victorian corset, and then I thought I would make a stomacher and have these front lacing as well as back lacing, but then realized I had accidentally used up the rest of my hopsack fabric on my dog's Halloween costume and I'd totally forgotten that I was also going to need to make shoulder straps and OH GOD WHYYYYY.

So I had a meltdown.

But I recently started working on my friend Melissa's stays from Costume Close-Up, and then started stressing out about how to connect the panels together because I'm trying to make them using historically correct techniques (except for machine sewing the boning channels). So I decided to use my hopsack stays to practice.

Costume Close-Up says the panels of the stays in the book were butted together and whip-stitched. I read somewhere else online regarding some other extant stays that they were butted together and sewn together using a joining stitch.

So I did this, and it wasn't difficult at all!


I also decided to line it with this sturdy cotton fabric I found at Saver's. I don't know what you'd call it.


See, how the writing says "81.5 m"? I don't think it's ever been cut. My conversion calculator says 81.5 m = 89 yds. I haven't been able to unfold it all the way to measure it out because it's a huge heavy pile of fabric and if I try to lay it out on the sewing table, my cat will sit on it and will keep trying to sit on it every time I move her, and if I lay it out on the floor the dog will want to play with it.

It was only $7.99! Did I really need 90 yards of Japanese (or is it Chinese?) sailcloth (or whatever it is)? No. But it was a hell of a deal.

So being that I'm impatient to get this damn thing done so I can order my Anglaise pattern from Larkin and Smith, I decided to just lay the stays out on a length of this fabric and trace the outline rather than cut out and sew up the pattern again.


Will this work? I don't know. I'm not going to line the tabs.

I clipped the curves, pinned it to the inside, and started to slip-stitch it to the edges of the stays while watching The Paradise.


I think this lining is going to make the stays a lot more sturdy.

I'm hoping I can get it done by this weekend so I can set the grommets. My dad has an awesome work table in his garage and the weather should be warm enough that my hands won't go numb while working on it. Mayhaps I can also set the grommets in my Victorian corset so that I can model both next week.


Monday, November 17, 2014

Semi-annual blog post: Simplicity 7541, the most perfect dress pattern EVER

I logged into Blogger last week to check my favorite blogs and was appalled to see that my last post was at the end of July. Not that anyone has noticed, but I still felt bad about it. I need to do some more "Old Letters" because I've got some really juicy ones, I need to do some dress pattern write-ups, and I need to talk about the stays I've been working on. Oh, and my Victorian corset.

But for right now, I give to you the most perfect dress pattern in the world: Simplicity 7541, a vintage 1997 pattern for a pullover a-line dress. It had been in my stash for about a year before I finally made it up, and since then, I've made FOUR of these in different fabrics. I only have pics of one of the dresses--no wait, I made one for my Galveston beach weekend with my sister and she snapped a pic when I wasn't looking.

Let's take a look:

Front, obviously. That little buckle in the neckline isn't a sewing mishap. The dress just got hung up on m'lady and I didn't notice while I was taking the pictures.
Side front.
Back.
 

Can't really see the dress but isn't the beach GORGEOUS in the morning? My sister and I have decided to buy condos next door to each other on the beach when we retire and wear muumuus and drink cocktails on our porches every evening while watching the sun set over the ocean. We will be known as "you mean those old ladies that are always outside drinking?"

These pictures may not show the awesomeness of this pattern, but I assure you, it is the best for the following reasons:

1. It's only two pattern pieces.
2. No darts, no gathers, no zippers.
3. It's loose yet skims the figure for a most flattering look.
4. The a-line style would look good on ANYone, any size, any figure type.
5. Cool and comfy in summer. Could make it in wool or flannel and wear it with a cute blouse and tights for winter.
6. It's a perfect "eatin' dress." Meaning, you can pig out and your food baby won't show. That's why I made several for the beach, because my sister and I planned on eating fancy cheeses, salty meats, tiny pickles, crackers, and desserts all weekend, washed down with plenty of whisky, wine, and vodka.***


The pattern comes in two lengths. I made the shorter one and I made it without the pockets. I don't have time for pockets.

The neckline and armholes are supposed to be finished with facings. I didn't use facings.

In my first version of this dress, I used a very lightweight cotton lawn and did a self-fabric lining.

In the yellow version, I lined it with a cotton gauze but I think that was overkill. I just didn't want to do facings.

On the black dress above, I used bias binding for the neck and armholes, which ended up taking longer than putting the dress together.

In retrospect, I think that facings are best if you are using a heavier fabric for this dress. If you're using a lightweight fabric, lining it works best.

The only change I made to the pattern was to shorten the waist by about an inch and a half, because I'm very short-waisted. The pattern does have a slightly fitted bodice in that there's a waist indentation on the pattern, so I felt it would have looked "off" if I hadn't shortened the waist.

I love styles like this because as someone who has tummy issues and frequently has to deal with sudden bouts of bloating (more like inflating, to be honest), I appreciate being able to wear comfortable clothing that's still cute and flattering. A dress doesn't have to hug the body or emphasize any particular part of it to still be cute.

***that lasted about 18 hours and then all we wanted to eat was salad and boiled shrimp.

Monday, July 28, 2014

Early 20th century bodice

This is the second antique bodice that I found at the City Wide Garage sale back in June. It's tattered all to hell but I still had to have it. I've had it gracing my vintage Dritz My Double dress form for a while now. I squished the dress form down as small as I could and I could barely hook the waist closed.

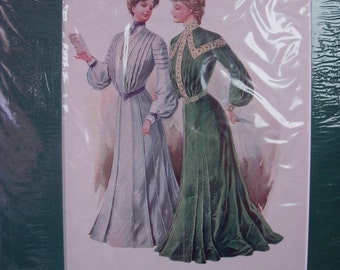
It's pretty obviously a pigeon-front waist from the early 1900s. The sleeve style is so distinctive to me, with the fullness gathered at the cuff, and I knew I'd seen examples of that somewhere--probably on Isabella's blog. I managed to find this image from 1904 that is just exactly the style of my red plaid waist:

https://img0.etsystatic.com/017/0/6264337/il_340x270.471145048_szm5.jpg


Every time I look at it I wonder who wore it. How old was the original owner when she wore this? Was she a young teen or a lady of a certain age? Was she a young mother? A wife? What was she like? I'd like to think this bold red plaid with the jaunty black buttons reflected the vivacious spirit of its owner.

That's why I love these things. I'll never make a pattern from it, because I think the pigeon-breasted styles were ugly to the extreme--who ever thought it would be a good idea to purposefully try to look sway-backed and pot-bellied??? But I just love to imagine who might have worn it. I don't feel like it's haunted, but I do feel like I get a little bit of a feeling of its previous owner. I also like to think that it was handed down in her family through the decades as a treasured reminder of her. I don't know how it ended up in the rag seller's hands but I'm glad it got into my hands after that. I don't care that it's shattered and torn to shreds in places. I just love the fact that 110 years later, this former beauty is still hanging around.

Wednesday, July 16, 2014

1911 Edwardian corset properly photographed and sewing woes

Lots of uneventful things have happened in my life lately. I'd hoped to have my 18th century stays completed by now and the Larkin & Smith English Gown pattern in my hands, but for some reason I just can't figure the stays out. This confuses me. I know how to make a corset. I know how to make an Elizabethan corset. This should not be a problem for me.

But it's the boning channels. I get massive anxiety any time I have to transfer pattern markings to fabric. I've traced the pattern out four times and thrown it away in a fit of rage every time because I always mess up drawing the boning channels.

Like this:


I thought last night that I was drawing the boning channels in wrong compared to its mirror image piece. now I'm not sure. Part of my problem is that I have trouble with spatially imagining it or viewing it backwards in my head or however you would word that.

So after my fit of rage, I taped the remaining pattern pieces to my window and drew the boning channels in from the back side so I would have something physically in front of me to guide me, rather than in my head. Yes, I know I marked the top and bottom of the channels on the piece shown, but that didn't help me.

Instead of dwelling on the lack of progress I've made in sewing anything, I'm going to post pics of my 1911 corset, which I was able to finally photograph properly because I got a new dress form.

Here she is:


I LOVE HER. I am so happy with the way she looks. The gap in the back is slightly bigger than it is on my body, since I have lots of squish and m'lady is firmer of flesh than I am. It's still a bigger gap than I wanted it to be, but lots of costumers have made this corset and many of them have a comparably large gap in the back, so I'm just going to go with it.

The only thing I don't like about this corset is that I get major back fat muffin top when she's laced tightly. That's why I didn't have my corset lacing pal take pics of the corset on my body. And which makes me think she's not meant to be laced as tightly as she was when I was trying her on properly.


Tuesday, June 24, 2014

Antique bodice - early 1900s

This weekend I went to the City Wide Garage Sale and was thrilled to find a couple of very antique bodices, as well as some Edwardian unmentionables and an interesting old nightgown. I'm going to post pictures of all of these things but one at a time, since the posts are going to be picture heavy.

My favorite vendor had this bodice. I about died when I saw it. I know it's been hacked up but I just loved it. The fabric is a thick, deep black silk with a lovely sheen, and it's in incredibly good condition. Just a couple of tears on the front of the bodice. It's lined with black polished cotton (I think), and the boning is secured with black petersham ribbon. Fastens with hooks on the back. Without further ado...

Bodice front back. The creases from the pleats are still crisp, even though the trim was cut away. Hopefully long ago.

Bodice spread out, looking at it from the back front. The fabric from the back of the bodice has been hacked away but the lining is intact and in amazing condition. Look at those sleeves!

Bodice back front.


Bodice interior.
 
There is a lot of hand sewing in this bodice, but there also appears to be machine stitching too. For instance, the sleeves were pieced. When I looked inside the sleeves, they appeared to have originally been machine stitched, and then the fullness was taken in at some point, and that was done by hand.

Exterior of pieced sleeves. God, fluorescent lighting is awful. The color of the fabric is nothing like this.

Inside of the pieced sleeves. Do you see the stitching at the bottom, which is machine stitching, and the stitching at the top where the sleeve was taken in is obviously hand stitching.
Machine and hand stitching.

Undersleeve.

This is the inside of the undersleeve. This is machine stitching, right?

Construction of the bodice wasn't as meticulous as I'd thought it would be! But that makes me happy, because then I don't have to be so critical of my own craftsmanship. Although that doesn't mean I don't continuously try to improve.

But look at the way this lace was attached at the back shoulder--it was too long, so the maker folded the excess underneath and basted it down.

Look how this excess trim was dealt with. I wonder if this trim came from another gown, and that's why it was too long for this?
Oops, the neckline was too wide. I love that little tuck to take it in. I have to do stuff like that a lot.

I really wish the neckline trim was still there. What are the hooks on the back of the bodice neckline for? What are the hooks on the inside back of the bodice for?

Is my guess correct, that this is an 1860s bodice? It doesn't appear to have dropped shoulders though. But pagoda sleeves were popular in the 1850s-1860s, and I think the pleated front was too. Isabel, if you're reading this, would you weigh in?

ETA: No, my guess was not correct! It was off by several decades! Isabella from All the Pretty Dresses kindly educated me and provided lots of links in her comment that helped me see what she was seeing.

And then I saw this picture from the Barrington House web page and it makes me think my bodice must have looked very much like this one:

I can just picture my bodice with fitted lower sleeves like this and flounces down the front.